WhatsApp with Zapier integration


Zapier is an online service that automates processes between web applications. It works as a "middleman", connecting tools such as CRM, email, finance and others to perform tasks automatically.
It can be used to create a "task" (called a "Zap") to perform certain actions in response to events, such as a new contact in CRM or a new message in email. For example, you can set up a Zap to automatically add new contacts in your CRM to Google Sheets.
The platform supports over 1,500 web applications, including popular tools such as Slack, Trello, Gmail. This makes it a very flexible tool for automating business processes.
With Zapier, you will also be able to synthesize with WhatsApp via 1msg.io apps. You will be able to send, receive messages, update and check their status, as well as upload all the necessary data to a google spreadsheet. In this article, we will show you how easy it is for you to do this.
It's only $30 for full access to WhatsApp Business API
Chatbots, chatbot builder, inbox chat, automated replies, broadcast newsletters - all included in the $30 price tag
Connect WABAHow to set up WhatsApp integration with Zapier in 5 points?
- Register with Zapier and 1msg.io.
- Create a new ZAP.
- Link it to your 1msg.io account using API KEY and API URL.
- Link the new ZAP to google tables.
- Set the desired query and collect information about WhatsApp messages in Google spreadsheet.
Now let's break it down in more detail and with intructions.
WhatsApp integration with Zapier
The first thing you need to do to start integrating Zapier WhatsApp API is to go to the Zapier website and register, you will immediately have access to over 1500 different web applications. The free version has its limitations, but the free version is sufficient for initial WhatsApp Zapier integration and the first episodes of working with the messenger.
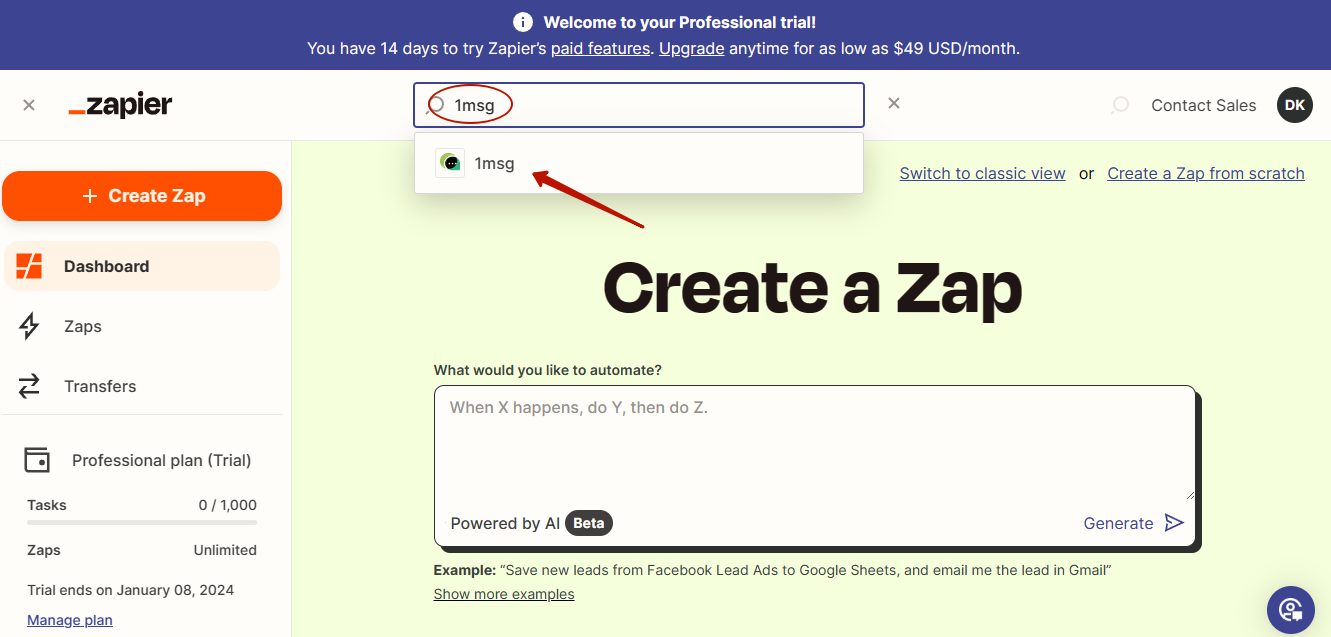
After registration you will find yourself in your personal account, where you can integrate with other web applications, to synthesize with WhatsApp Business API you need to find us among Zapier applications, for this just type in the search "1msg.io".
The hard part is done, now let's move on to creating and setting up Zap with WhatsApp. Before doing this, it is necessary to understand "triggers" and "actions" in Zapier.
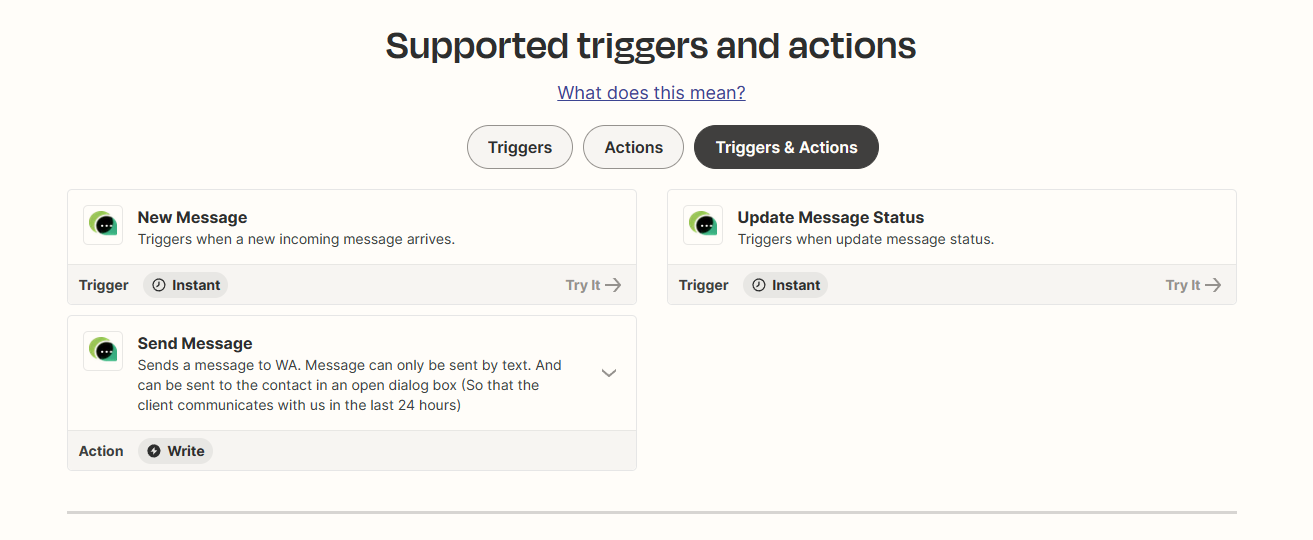
Triggers are events that happen in WhatsApp, the data about which you can capture and store. You can say that triggers are less dependent on your actions. There are now two types of triggers available in Zapier, with which you can create your own Zap or WhatsApp integration. These are a new message trigger and a message status trigger. In the first case you capture information about the message and its content and save it in google sheets, and in the second case you capture information about the status of the message: sent, delivered, read. Each status change will be transmitted through Zap to your google spreadsheet.
It is also possible to perform an "action", in our case sending messages through your Zapier integration. But let's start with the triggering events.
Zapier trigger on incoming message in WhatsApp
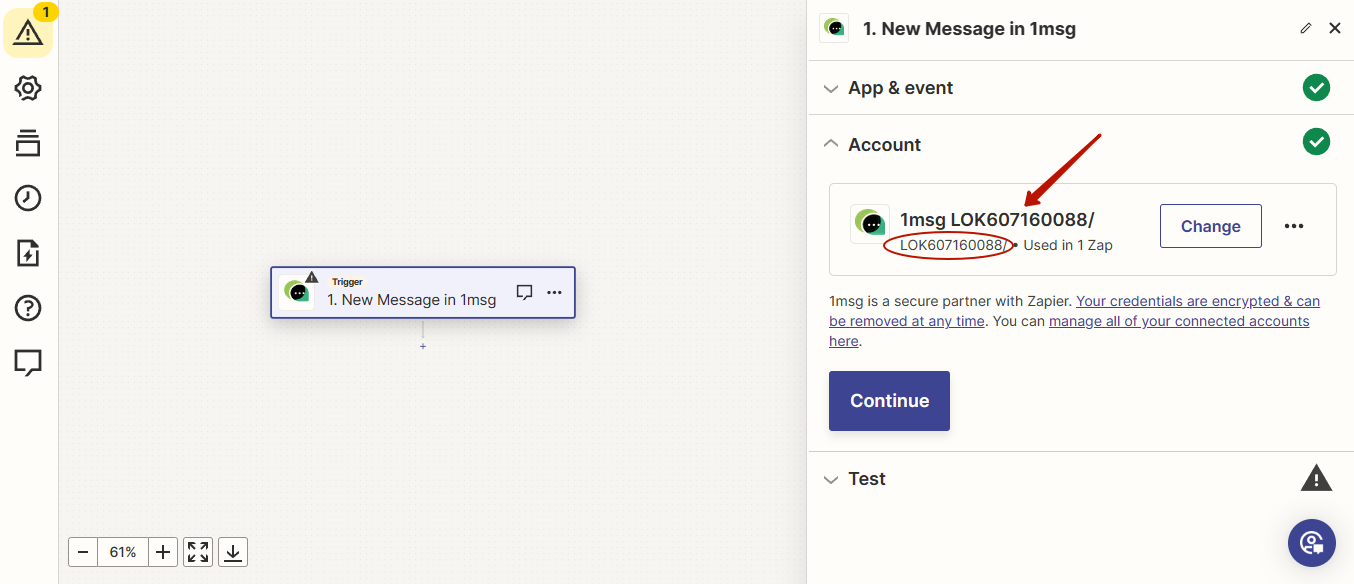
Create a new Zap and set a trigger on incoming messages to 1msg.io in the first block.
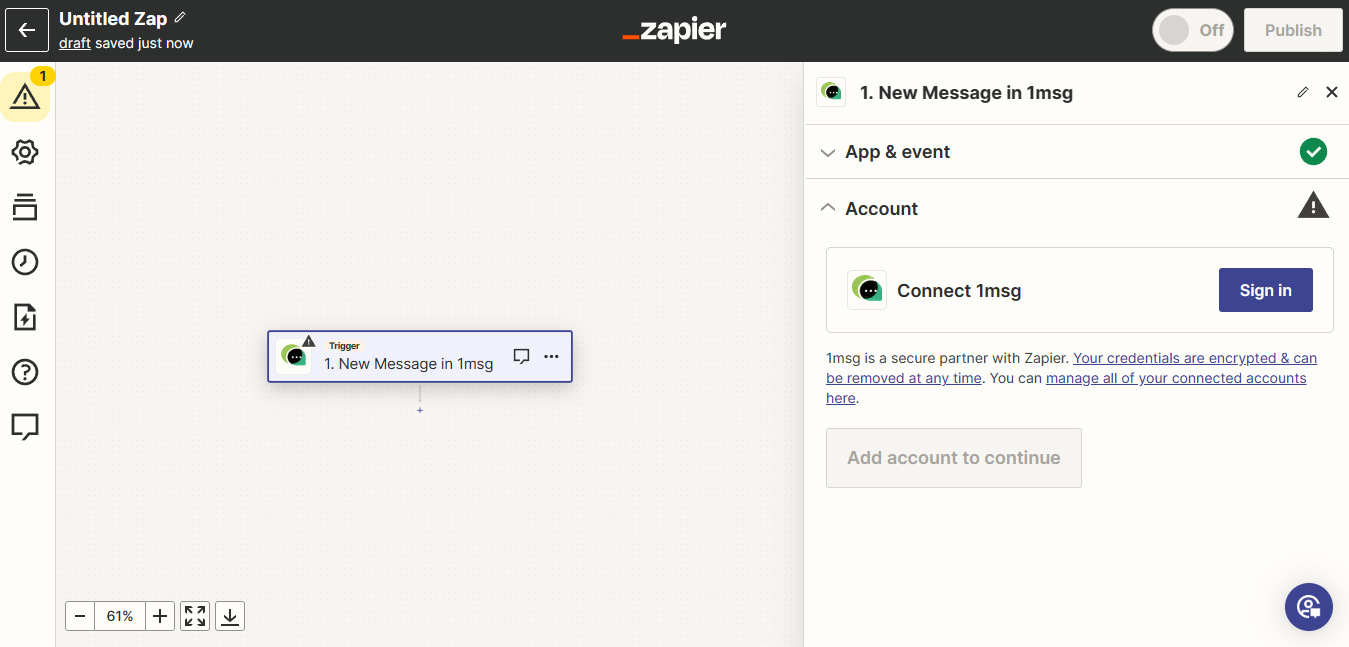
For further work you will need to register and get API KEY and URL in 1msg.io personal account.
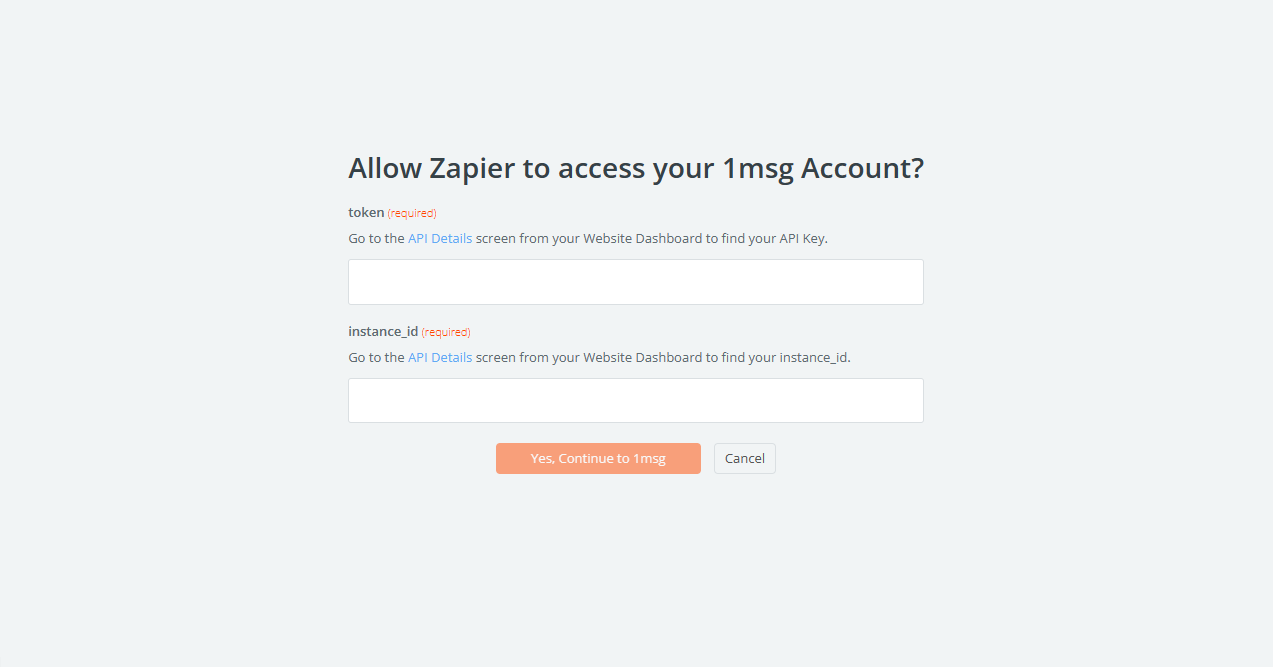
You can get the necessary data in your 1msg.io personal cabinet: go to the channels section, select your working project with connected and active WABA number, copy the keys and url in the main screen.
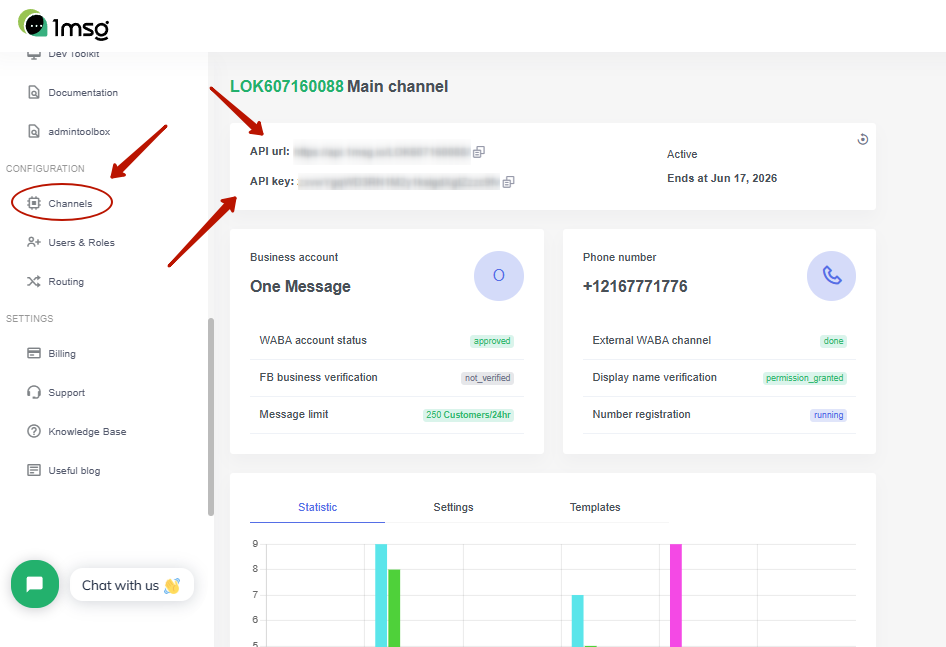
You can copy the API KEY and API URL from here. In this case, the token is an API KEY, and the instance ID is an API URL. Note that when you copy the URL, it should be copied without https://api.1msg.io/, but just the number, e.g. LOK607870088. Otherwise Zapier will indicate an error.
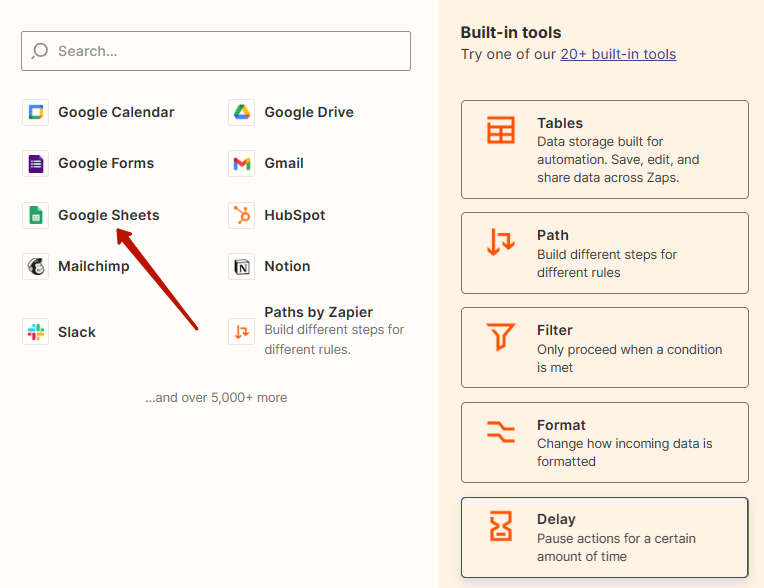
After that click "+" under the block with 1msg.io, you will be given the option to link 1msg.io with another web application, here you need to select google sheets.
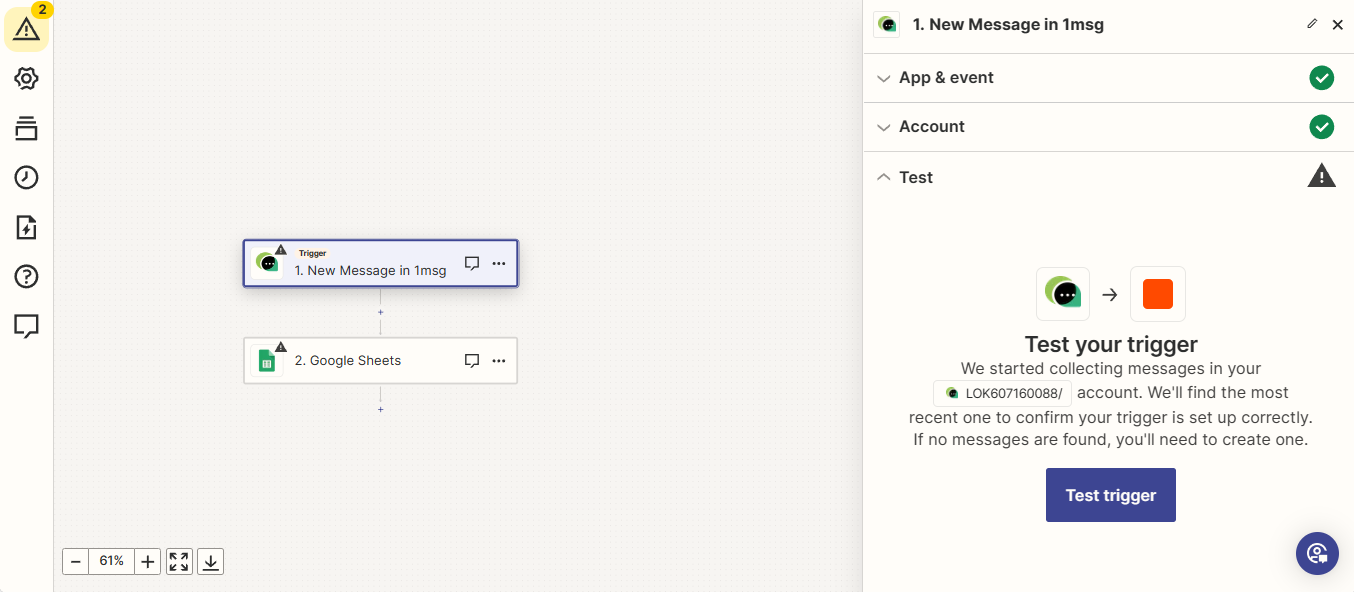
The look of Zap is somewhat reminiscent of the visual constructor of bots in your personal account, as is the principle of action in blocks in a way. After creating the block with google table, go back to the first block with 1msg.io triggers on a new incoming WhatsApp Zapier message. Finish the configuration and press test. You'll see the response option from the server, which is basically just a list of sample responses to queries. You will see all the information you can get from the server, including the message ID, Body (i.e. text) and status.
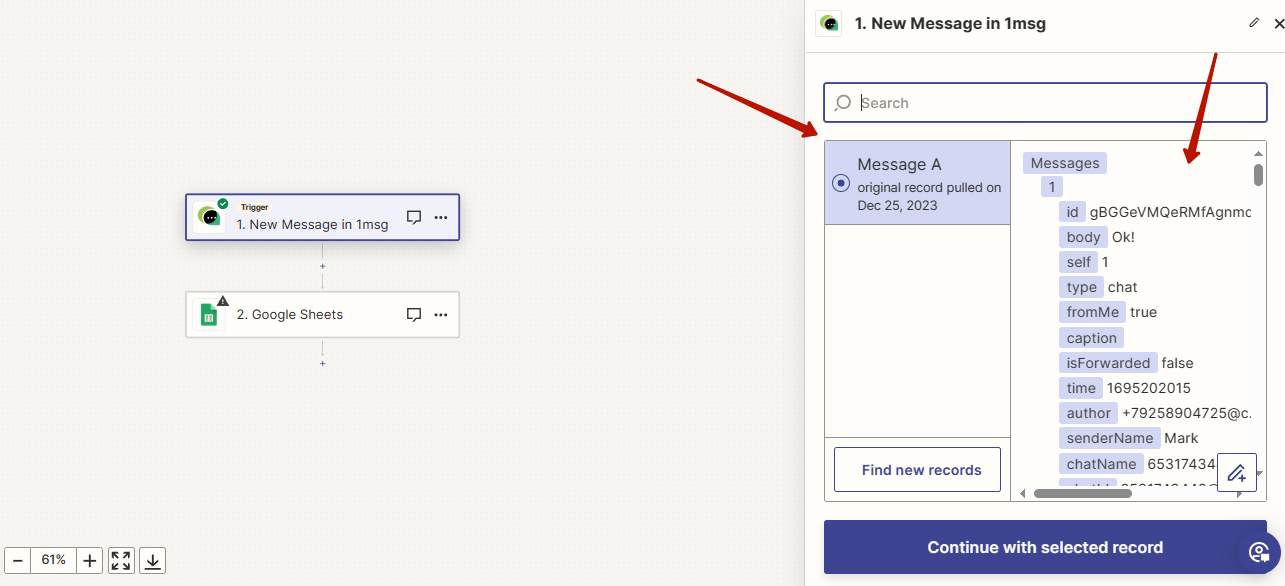
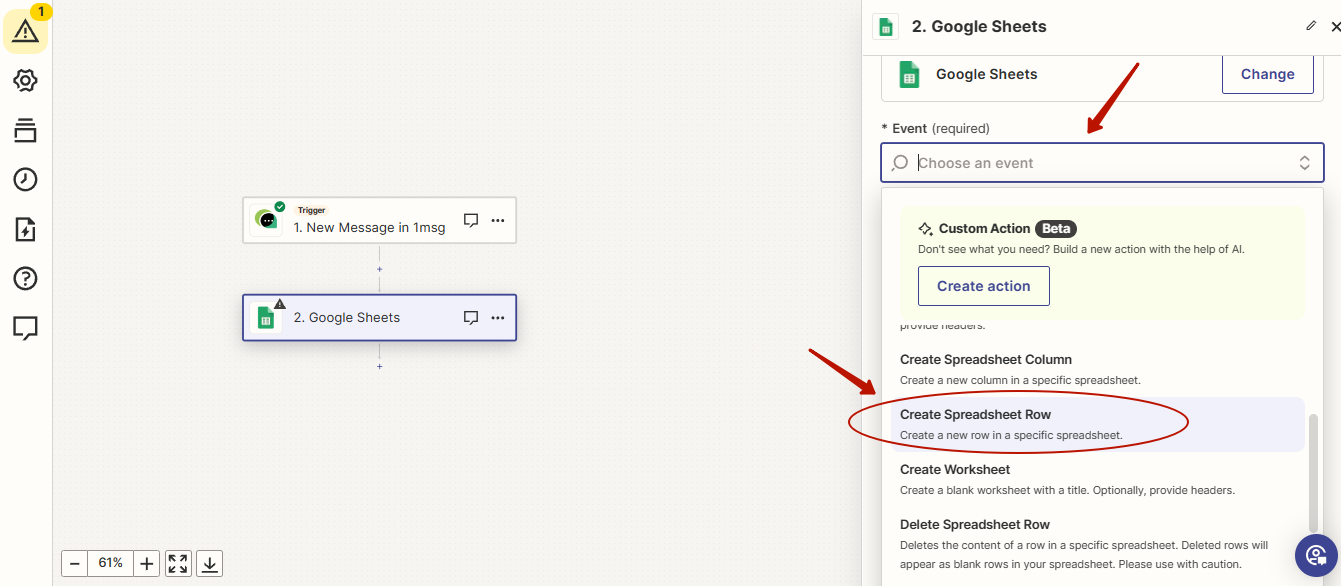
Note that there is a green checkmark next to the block, which means that we have configured the first block for incoming messages correctly. Now we have to move on to setting up another block with google tables, so that it is where the information about all incoming WhatsApp messages is saved. Select to create a new row in the settings.
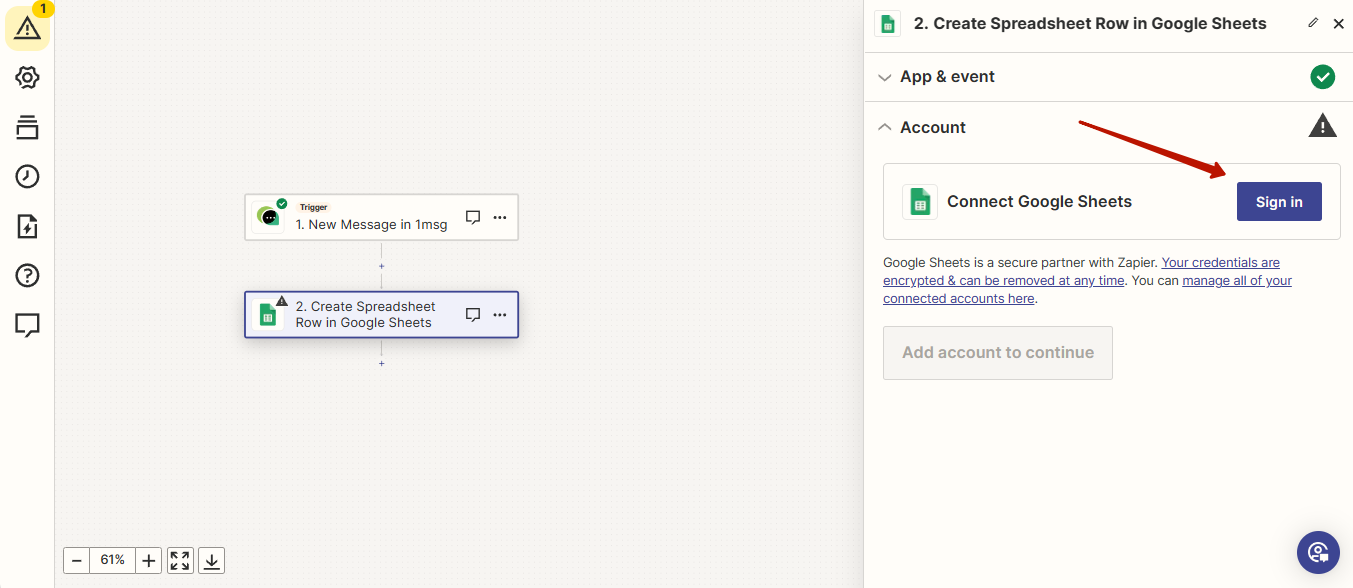
This is necessary for message data to create new rows in your table. Next, you need to authorize in google tables so that Zapier can access your spreadsheets.
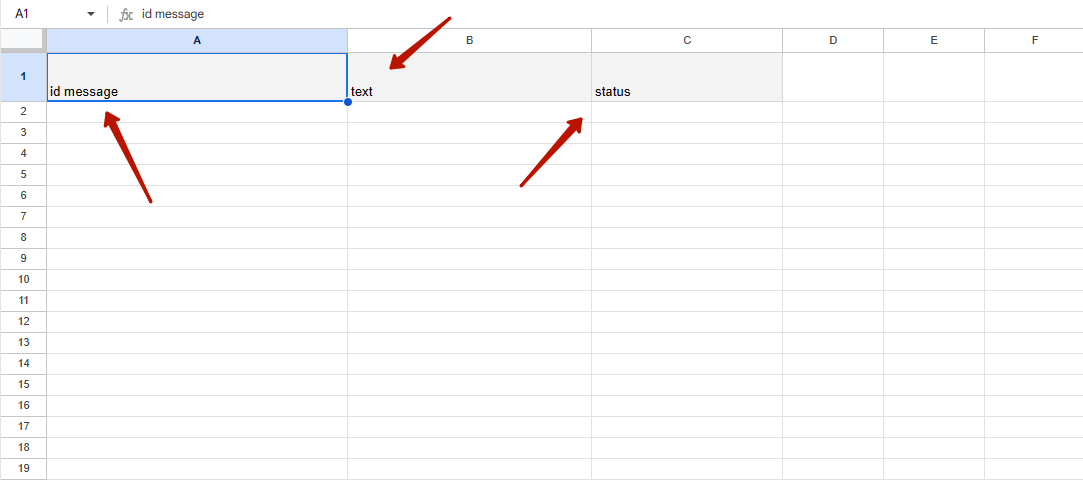
Next you have to create the table you want in google tables, roughly it can look like this, note that the rows have the name of the information you would like to get from the queries to WhatsApp Business API.
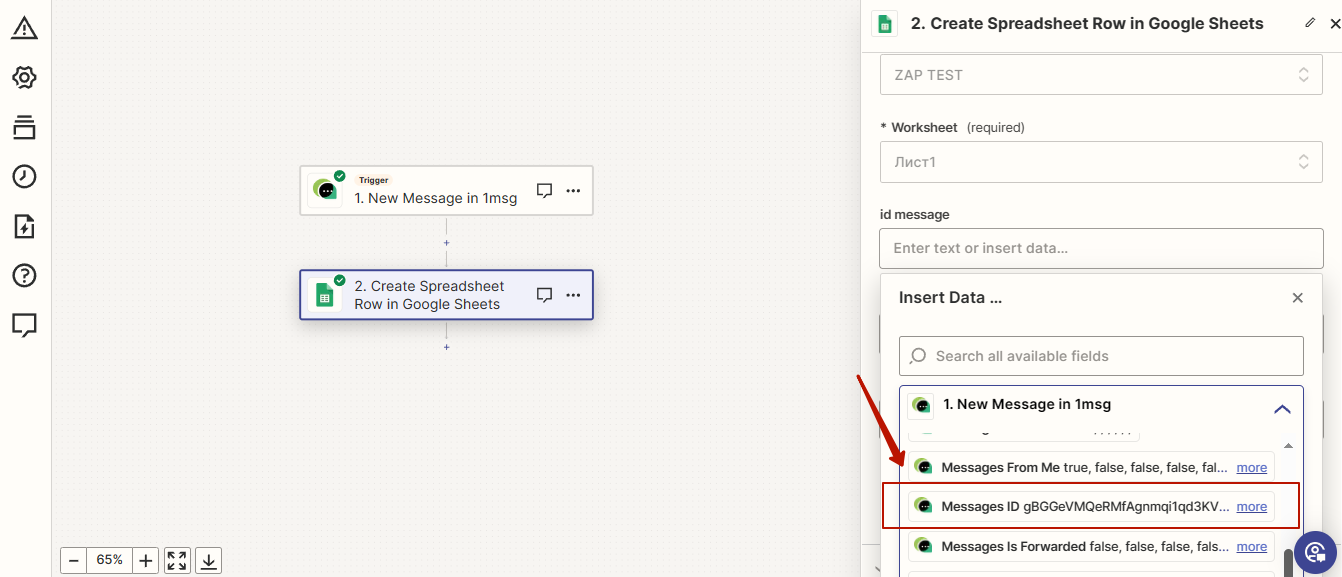
The final step in customizing the table block is to specify the key information: the name of the google table, the table sheet, and the processing of the query we need. Everything is set up quite easily, Zapier itself will point you to the missing information. It is more difficult to decide on the query you want to run, if you are interested in the message id, then choose it, if you need the text of the message, then choose Body.
This is the last important step, after that you can finalize the configuration and create your Zap. Now all the messages that will come to you in WhatsApp will be displayed through Zapier in your Google Spreadsheet. To get the status of messages in the same way: sent, delivered, read, you need to create and configure another trigger, a trigger on message status.
Zapier's trigger to change the status of messages in WhatsApp
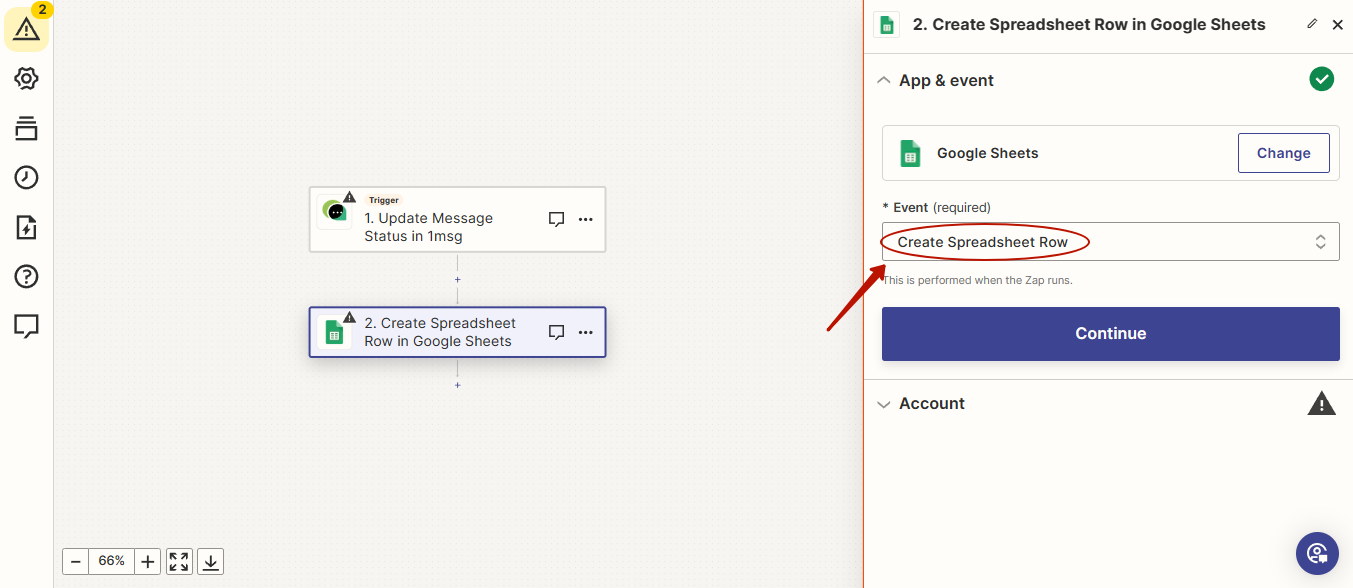
Configuring this trigger is very similar to configuring an incoming message trigger, with a few minor exceptions. Select the post status update block in the start menu and also select and create the google spreadsheet block.
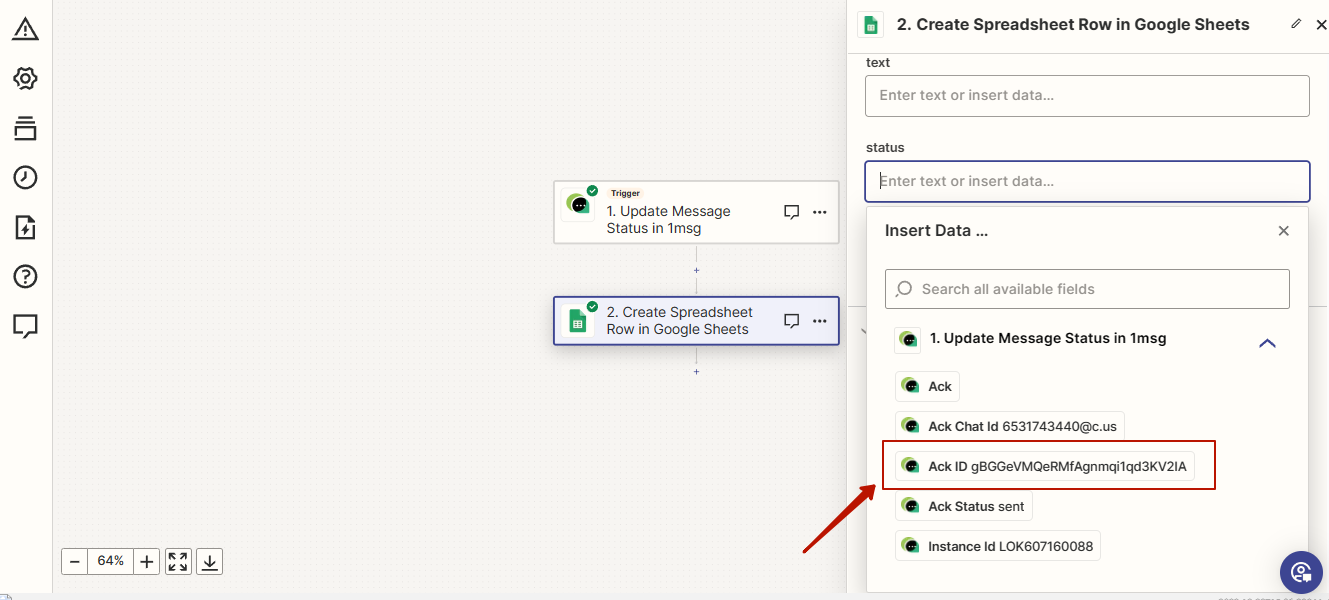
The difference is that now in the table we select ACK ID, so that in the table we keep information about the status changes of messages in WhatsApp.
You're all set, complete the setup, don't forget to check the spreadsheet and let Zap collect the status change information for you online in a google spreadsheet.